Sunday 10 November 2013

Evaluation Questions


a. List the materials that were used in the construction of your mechanized toy.

Ply Wood
Dowel
Wood Glue
Hot Glue


b. Describe some environmental problems which are caused by the overuse of wood products (i.e. deforestation).
The main environmental problem caused by the overuse of wood products is deforestation. Trees are destroyed, but so are the habitats of many native fauna, e.g. birds loosing their nest and eggs, meaning the species of birds could become endangered. Deforestation effects flora as well, many species of plants live off the minerals contained in the trees that are chopped down. Some other environmental problems include pollution made by the factories, the increased erosion and global warming, leading to sea levels rising.

c. Explain the difference between ‘open-loop and closed-loop’ control systems. Give an example of each.
An open-loop control system is a system that doesn’t have a feedback loop and is not self-correcting. A closed-loop control system is a system in which the output has an effect on the input in such a way as to maintain the desired output value. An irrigation sprinkler system, programmed to turn on at set times could be an example of an open-loop system. An example of a closed-loop control system is a controller for a video game.
d. Provide a brief description of 3 different types of mechanisms i.e. linkage, cams
Cam: A cam is a projection on a rotating part in machinery, designed to make sliding contact with another part while rotating and to impart reciprocal or variable motion to it.

Linkage: A mechanical linkage is a series of rigid links connected with joints to form a closed chain, or a series of closed chains. Each link has two or more joints, and the joints have various degrees of freedom to allow motion between the links.

Leaver: A machine consisting of a rigid bar pivoted on a fixed point and used to transmit force, as in raising or moving a weight at one end by pushing down on the other.

e. Provide an in depth description of the primary mechanism used in your toy.
The primary mechanism used in my mechanism is offset cams. There is only two cams in the whole design. These cams are used in a circular motion by moving the handle in a circular motion, creating the output of making the peacocks move up and down.

f. Evaluate your finished product in terms of ergonomics, aesthetics and function.


Function:
Although I haven't finished the mechanism yet, I have a idea on what the mechanism will turn out like. Honestly, I think the mechanism will do what it's aimed at to do. I'm not sure how effectively it will work though. In conclusion, I think there are some improvements I can make to help my mechanism improve its overall function, I'm just not sure how to do it.

Aesthetics:
I am quite happy with the movement the cams, they still stick sometimes but I think after a bit of wear they will be working fine. I still need to paint my peacocks and add pipe cleaners to the tail, but I’m going to use bright colours giving it a very modern look.

Ergonomics:
In terms of ergonomics, this mechanism is extremely safe as there is little chance you will become injured by getting fingers stuck or hurting yourself. It is very easy to use and I think the handle is a perfect length.

Tuesday 22 October 2013

workshop lesson - term 4

I have now finished making my box for my mechanism. So far I this term I have:
  • Measured and cut my MBF wood pieces which were 6mm thick, 220mm in length for the top and bottom, 120mm (plus 12mm which is 132mm for the right width) on the ban saw for my box mechanism.
  • Sanded down the edges of these wood pieces on the disk sander.
  • Cut my stoppers from a light, thin rod of wood.
  • Drilled an 8mm hole through the sides of my box making sure everything lined up.
  • Glued my wood pieces together with a hot glue gun, creating the box itself. This included re-gluing my wood stoppers in the right place so my box was evenly balanced etc. 
  • Threading my dowel into these holes. 
  • Cutting a circular end of wood for my handle stopper with a cut-out drill (see image below of Kelsey having a panic attack while Mr Andrews forces her to use the drill again after an incident that happened in a past lesson). 
  • Drilling a hole through my circular wood piece on the side. I then glued a small piece of cut-off dowel into this hole so it could be used as a handle. 

Wednesday 9 October 2013

Workshop lesson - term 4

We were finishing creating our boxes from the end of term 3 this lesson. I had a bit of trouble with the hot glue gun and gluing the stoppers in the right place. I accidentally glued my stoppers on the sides of my box instead of on the lid. This then made the box uneven in height and the sides weren't parallel. I fixed this by ripping off the stoppers of wood and fitting them in the right place. 

Thursday 5 September 2013

Assesment Questions - Q3


3. Extrusion, injection moulding, compression moulding, vacuum forming and laminating are examples of common manufacturing processes used with polymers (Plastics). Choose one process and with the use of diagrams and bullet points outline the process.

Injection Moulding
  • Materials such as polystyrene, nylon, polypropylene and polythene can be used in injection moulding. These are all thermoplastics - when they are heated they can be manipulated into a mould and form different shapes 
  • Lego bricks are made by injection moulding.
  • Here are the steps for injection moulding.

1. Plastic powder grandules are poured or fed into a hopper which stores it until it is needed.

2. A heater heats up the tube and when it reaches a high temperature a screw thread starts turning. 

 3. A motor turns a thread which pushes the granules along the heater section which melts then into a liquid.  The liquid is forced into a mould where it cools into the shape (in this case its lego bricks)
4. The mould then opens and the brick is removed (after it has cooled down).

Wednesday 4 September 2013

Assesment Questions - Q2

 
2.      The material you are using for your desk tidy is called Polymethylmethacrylate (ACRYLIC). It has specific properties and uses.  Choose 2 other common polymers and in table form give their industrial name, common name, properties and uses. 

 
INDUSTRIAL NAME
COMMON NAME
PROPERTIES
USES
Polyvinylchloride
PVC
Rigid, quite hard and tough, has good resistance to chemicals
Pipes, guttering and window frames etc.
Polyethylene
Polythene
2 types:
Low Density (LDPE)
High Density (HDPE)
Flexible plastic, soft, good chemical resistance and has waxy feel.
Food bags, bowls, buckets and bottles.

Assesment Questions - Q1.


1.     Choose 2 machines that you used in the fabrication of your desk tidy. With these machines in mind, outline WPH&S (workplace health & safety) considerations that must be adhered to when using these machines. Include photographs of your chosen machines
  • Disk sander - Used to sand woods and plastics and to remove waste material.
WPH&S - Goggles worn at all times. Hands and fingers kept away from rotating disk. In stance standing position using only the right side of the machine (school one, not one in image).


  • Buffer – Used to finish off and polish plastics such as Perspex and soft metals such as copper or aluminum.
WPH&S – Goggles worn at all times. Long hair tucked into uniform or hairnet. Sturdy footwear worn. No rings or jewelry worn. No loose fitting clothing, protective clothing worn.  


Thursday 8 August 2013

What I've done/need to do

 So far this term I have: 
- drawn many ideas for my desk tidy 
- created a 1:1 scale drawing of my chosen design 
- created a full prototype out of cardboard and masking tape 
- drawn my desk tidy net on acrylic plastic 
- started cutting out my net on the ban-saw 

What I still need to do this term: 
- finish cutting out my net 
- sand, file and buff my acrylic 
- bend the acrylic where it needs to be bent 
- glue the acrylic where it needs to be glued together 
- FINISHED!!!!! (I think)

Wednesday 7 August 2013

Workshop lessons - week 1

We spent this week in the workshop working on our prototypes for our desk tidies. To create a prototype we had to have all our designs finalized and have created a one to one scaled drawing. Our prototypes were created with cardboard and tape. I started creating my prototype in the style of a net. I did this because I will then create my actual desk tidy on acrylic as a net so it doesn't use an unnecessary amount of cardboard and I can bend it on the strip heater. 


When I was creating my prototype I found the most difficult thing was drawing lines straight and parallel. If I didn't keep my lines parallel then the measurements would be wrong and the pieces wouldn't fit. I've now finished my prototype and have started drawing my net on my chosen acrylic plastic (dark green). 


Saturday 27 July 2013

Designs - Part 2

Design 5: 

Pros: 
- Basic design: doesn't use much plastic 
- Can hold a phone/iPod 
- Won't use much surface space 

Cons: 
- Too basic 
- Can't hold A4 paper/iPad 
- Visually not nice 

Design 6: 

Pros: 
- Holds both phone and iPad/A4 paper 
- Holds tall objects 
- Long: can fit against a wall

Cons: 
- No place for smaller things i.e. paper clips and rubber 

Design 7: 

Pros: 
- Holds almost everything I need 
- Is nice visually 
- Long: can fit against wall 

Cons: 
- To big? 
- Have no place to hold pens/pencils 

Designs - Part 1

Design 1:

Pros:
- Visually nice 
- Good design 
- Holds small things

Cons: 
- No place for A4 paper/notepads
- Using to much surface space? 

Design 2: 

Pros: 
- Good design 
- Can hold iPad and A4 paper 

Cons: 
- Visually, prefer design no. 1 
- No place for phone/iPod 
- Would need to fit everything together more 

Design 3:

Pros: 
- Can hold iPad and A4 paper 
- Holds many things, big or small 

Cons: 
- To tall? 
- Base is to big and will take up too much surface space 
- No phone/iPod stand 
- Don't like it visually 

Design 4: 

Pros: 
- Holds many things 
- Can hold both iPad/A4 paper and phone 

Cons: 
- Base to big 
- Is not nice visually 
- Uses a lot of plastic 

Workshop lesson with Mr Ward

So in today's lesson Mr Ward took us through the workshop and showed us many things including:

- the type of plastic we are using and some facts about it (thermoplastic) 
- how to bend the plastic on the strip heater, including bending it on different angles 
- how to put the plastic in the oven to heat the whole thing up, making it floppy 
- techniques to glueing the plastic and how to use the glue 
- the different colours of plastic which are downstairs 
- the buffer and how we should always tie our hair up 
- some of the other classes designs and how they made them with cardboard 
- how to use the cutting board and whether it's better to use a Stanley knife or scissors. 

I learnt a lot in this lesson and am thankful that Mr Ward took the time to teach us these many things. 

Thursday 18 July 2013

TERM 3 - Desk Tidy Reviews

 Here are some of my reviews on desk tidies that I found online...
What I like:
- It has a lot of compartments
- It's compact and wouldnt use much desk space
- It goes up on different levels
What I don't like:
- I can't put A4 sheets of paper in it
- I can't see my phone screen 
  
What I like:
- It looks nice visually
- It's small and would fit in a corner of a desk
What I don't like:
- The compartments are mades for specific things only
- There's no place to put my phone or ipad
- There's no place to put paper or a notepad

What I like:
- It looks nice visually
- It holds my phone so that I can see the screen
- It doesn't take up much space
What I don't like:
- It only holds pens and a phone
- There is no space for paper or notepads
What I like:
- It looks nice visually
- The phone holder is really nice
- It can hold things other than pencils
What I don't like:
- It has no space for paper or a notepad
- I can't see the phone screen


Saturday 1 June 2013

Research Questions

Research Questions

What does CAD stand for? Computer Aided Design

What is a prototype? And why is prototyping important? A prototype is a early model built to test a design or process or to be replicated and learned from. It is important to have a prototype so the designer/s can test the safety of the design and the suitability of the design.

What is Rapid-Prototyping? Rapid Prototyping is techniques used to quickly make a scale model of part or assembly using CAD.
 
Before Rapid-Prototyping, how were prototypes manufactured? Before Rapid-Prototyping, Topography and photosculpture were used to test designs. 

What is the difference between a prototype and a production design? A prototype is used to test the design of a certain idea, where as a production design is the final design used to show businesses to have them stock that certain item. 

What is the difference between a visual prototype and a functional prototype? A visual prototype is a picture or drawing of what the final design should look like, these are used to show potential customers or businesses. A functional prototype is a model of the design that has been made which works. 

What is 3D Printing? 3D printing is a process of making a 3D solid object of any shape designed on a digital model. The 3D printing procedure is made using an additive process, layers of material are laid down in different shapes, slowly creating a 3D object.

What does the term CNC stand for in the design and technology industries? Computer Numerical Control. It means that a computer converts the design produced by CAD, into numbers.

What is an STL file? STL or stereolithography is a certain file used for the CAD software created by a 3D system.   

Tuesday 21 May 2013

Cube with rounded edges and a hole in

This was one of my first designs that our class did together, which I've just realised I have a picture of.

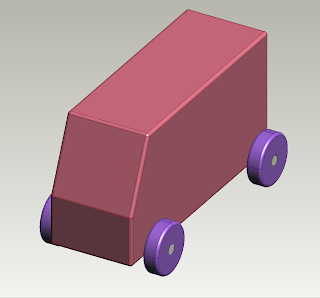
Van design

The past few weeks we've been doing different projects, and one of them was creating a van. I really enjoyed this as we did different parts of the van on different designs and then fitted them all together. This taught me howexact I need to be with my measurements, otherwise the design won't come together properly. I am really happy with my work and have learnt a lot of this design, especially how to use new tools.

Picture of my cubes


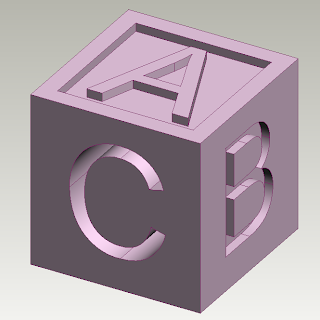
Here is a picture of both my cubes that I made. It was quite hard for me to get the hang of this at the start, but I'm learning more everyday! I know its been a while since I've posted on my blog, and I will try to add more very soon.

Wednesday 24 April 2013

Term 2 - First 3 lessons

This term we are using Pro Desktop. We are creating 3D shapes and are going to print them on a 3D printer. The printer does layers off plastic to create the 3D shape. So far we have created cubes and learnt the controls. I have made a plain cube, a cube with a hole going straight through and a cube with letters coming out and going in by 5mm. We are doing everything in mm because it is more exact. I think this term will be challenging as I'm not brilliant on computer programs, but we'll see how it goes.

Thursday 21 March 2013

My finished lamp!


Evaluation

Evaluation:

Aesthetics: I find that my Eco-lamp is aesthetically pleasing. Aesthetics uses our senses and our responses to a certain object. It involves all of our senses. If something is aesthetically pleasing, it is 'pleasurable' and you like it.
A conception of what is artistically valid or beautiful, artistically beautiful or pleasing appearance. (pretty)

Ergonomics: I think my Eco-lamp is very ergonomic. It has nice, smooth curves on the base and this makes very comfortable to hold. Ergonomics is designed to minimize physical effort and discomfort, therefore maximize efficiency.

Function: The task for this term was to make a practical desk lamp with wood blocks and aluminium. The function of my lamp is to give light to my study area at home, I feel that I have succeeded in completing this task and fulfilling the function for which it is needed.

Economics: Economics is the design factors intended to maximise productivity by minimising operator fatigue and discomfort. It is also concerned with the production and consumption. I feel that my lamp used the materials to its benifit and almost nothing has gone to waste. I did not cut any of my aluminium like some others did. I used two blocks of wood for my base but had to throw away half a block. My base did not need half of one of the wood blocks. Other than this I think my lamp has very good economics.

Isometric drawing of my lamp

Here is my isometric drawing of my lamp :)

5 Questions

What is the actual difference between light of different colours?
Different coloured lights have different frequencies and amount of energy (wavelengths).

Define the following lighting terms: ambient light, direct light, diffuser, luminosity, energy efficiency, watts.
Ambient: the light surrounding an environment or subject, natural/background light.
Direct Light: Illumination on a subject or area that goes directly from the front of the light source in a straight line to the subject or area.
Diffuser: Generally, something made of diffusion material that softens the quality of the light passing through it to produce a more flattering light with less noticeable shadows.
Luminosity: Luminous quality: The natural brightness of an object. "acrylic colors retain freshness and luminosity".
Energy Efficiency: The state or quality of being efficient: "greater energy efficiency".
Watts: Unit of power, the energy consumption rate of one joule per second

Comment on Global warming
LED lights are using their energy into making more light, rather than heat. This is helping to stop global warming as it is decreasing the increase of temperature of the earth's atmosphere. Halogens and incandescent lights use most of their energy to HEAT the bulb, rather than make brighter light like LED's. The more incandescent globes, fluorescent lights and halogens we replace with LED's, bring the rate of global warming down.

How can the modern home become more energy efficient with regard to lighting?
1. Using natural lighting, more glass windows ect.
2. Installing energy efficient lights, especially in rooms that are used often (bedrooms, living room etc.) and hallways.
3. Installing fittings that are dedicated to energy efficient lamps, LED.
4. Consider the type of light required for that specific home.

Wednesday 20 March 2013

Rogier Van Der Heide

Rogier Van Der Heide:
He is the Vice President and Chief Design Officer of Philips Lighting. He inspires designers to be creative with lighting by using bright colours different shapes. Rogier has designed outfits for the Black Eyed Peas, which they wore for many of their concerts. He creates many designs that use space, colour and different shapes.
“There is no good lighting that is healthy and for our well being without proper darkness.” - Rogier Van Der Heide


Thursday 14 March 2013

Alloy, solder, tinning.

In class today Mr Andrews asked us to find out what an alloy is, what a solder is, and what "tinning refers to".

An alloy is: a metal made by combining two or more metallic elements, used to create greater strength and resistance.

A solder is: a low-melting alloy, Usually based on lead and tin, brass or silver, it is used for joining easily melting metals.

"Tinning" refers to: It is the preparation for soldering a stranded wire so there is a good joint.

Friday 8 March 2013

Workshop - Lesson 8

I have very nearly finished my lamp but have now come across a huge design problem. I don't know how I'm going to attach the second part of my base. I have tried gluing it but I don't know if it's going to set. I don't think I'll be able to screw it in as I might hit me electrical wire. I will have to talk with Mr Andrews next lesson about what I should do if my glue does not stay. I have looked over my designs and now know what I should have done instead. I shouldn't have cut the timber but instead slotted my aluminium in between the base. I will post a photo underneath of how I could have designed it instead.

Steps to making a lamp

Mr Andrews asked all of us to put steps for making our lamps.

What I have done:
- Design and draw our lamp.
- Make a full scale drawing of our lamp to use as a template (especially with the curves of the aluminium)
- Cut our wood to the size on our template (some people had to glue) and sand.
- Bend our aluminium strip to the same degree as the template.
- Draw dots where we are going to drill our holes, with a larger drill-bit make a hole with the drill (have aluminium in vise)
- Screw hole in wood with a smaller drill-bit make a hole in the wood.
- Use handheld screwdriver and line up the four holes, put the screws in.
- Make a hole with the drill for the cord to go through in wood and aluminium.
- Cut the right length of LED strip to fit your light.
- Thread the cord through the hole, have a 2cm length of heat shrink wrap threaded on.
- Solder the LED light to the cord and plug.
- Heat the shrink wrap onto the soldered part (covering the first 2 lights).
- Remove the adhesive part of the LED and stick onto the aluminium.
- Put a plastic cap onto the top of the aluminium.
- Put a strip of white plastic (cut at 28mm wide) into my aluminium to hide the screws, holes and the wire.
(- An extra step that I had to do was to glue the second part of my base to me aluminium.)

Steps I still need to do:
- Remove all pencil marks off my wood and aluminium.
- Put an oil onto my wood to make it look nice.
- Drill 2 holes for my pencils in my wood base.

Hopefully I will be able to finish off all my last steps next lesson.


Saturday 2 March 2013

Progress Photos/ workshop lesson 7


These are some of the photos which I took at the end of class showing how far along I am with my LED light. I have now drilled my hole for my wire and threaded it through,  have soldered my wire and LED strip together, I have also used a heat shrink tube/table to hide the soldering and have stuck my LED lights onto the aluminium. I still need to add the plastic to hide the wire, drill holes in the base for pencils, and somehow attach my front base to the light. hopefully I can get most of this done by next lesson and then i can focus on my theory work.

Thursday 28 February 2013

Workshop - Lessons 4, 5 & 6

Continuing with my previous workshop lessons, I have finished bending and curving my wood and aluminium (photo below)  and have now also finished drilling and screwing my aluminium onto my base. Next lesson I will need to drill a hole for my plug and wire to go through and then will also need to solder my led strip to the wire.

Some problems I had in the workshop were:
- my first hole and screw were to low making it so I wouldn't have enough space for my plug and wire.
- Mr Andrews is not always available and this made it quite hard for my to talk about my design.
 What I did to help/fix these problems
- I undid my first hole and screw and measured it out again so that I had enough space for my plug and wire.
- I had to wait and ask some of the other girls for their opinions about what to do. While I waited I also help some of the people who were further behind than others.


Wednesday 20 February 2013

Workshop - lessons 1, 2 & 3

These past few lessons we've been working in the workshop. I've completed a full scale drawing of my base and my aluminium stand. I am using all my aluminium and am not cutting off a bit like some others. I have cut and sanded my base and it is all done. I have rounded the wood on all the corners so it feels more natural and organic. I have just started bending my aluminium and am going very well with it. I need to do my main bend and then I can move onto my next step of making my lamp.

Some problems I had while doing the first steps to my lamp were:
- I was a little nervous using the jig-saw as my piece of timber that I was cutting out was quite small.
- I wasn't sure if the degree of my bend would kink the aluminium and not make it look very good.
- I didn't know if I had enough aluminium to make and bend for my lamp.

What I did to fix/help these problems were:
- I asked Mr Andrews to help me and show me how to do it. He then supervised me while I was cutting.
- I asked Me Andrews what the maximum bend would be and then changed my design to fit the bend.
- I measured how long the aluminium was and the measured what my scale drawing was to make sure it fit.


Wednesday 13 February 2013

Final Design

So after  talking to quite a few people around the boarding house and calling my parents numerous amounts of time for their opinions and ideas, I have decided to go with design number four. This is because I think it will be less predictable (as I'm not using a triangle to balance it), it is quite an easy and space saving design and overall this was my favorite because it fits into my space at home very easily. I am posting a picture below with an A4 sketch so I can use it in the workshop as a template. :)

I might change the front of the base so that it doesn't take up as much space. Will try and get a photo up soon.

Fourth design


This is my fourth design for my LED lamp. 

Pros:
- The base looks big and heavy.
- It has a large area at the top for LED strips to go. 
- It has a very organic shape to it and I like how the aluminium curves around the wood.

Cons:
- Even though the base is quite big it looks unstable.
- The top of the aluminium doesn't.
- Its quite a thick piece of wood and I don't know how well I would do drilling my hole for the plug and wiring.

Some of the aspects are good but I don't like the overall design and don't think it would be very practical. 


Third design

This is my third design for my LED light.

Pros:
- I like how it is not using as much aluminium as my other designs.
- I like how the aluminium is on an angle where the light is going to be giving it more area to light up
- I like how the back base is quite tall giving it a bit more balance.

Cons:
- The main part of the aluminium might be to long giving it an off balance look.  
- Its not very ergonomic and hasn't got many organic shapes.
- It looks like it might fall over sideways.

This is not my favourite design, though I do like some of the aspects in it but I don't think I will use this one.

Second design

This is my second design for my LED lamp.

Pros:
- I like how the curves to the aluminium look very natural.
- I like how there is a piece of timber at the front to balance it out.
- I like how the aluminium is on an angle where the light is going to be giving it more area to light up

Cons:
- I don't know if the piece of timber will balance out the whole lamp, and if it might fall forward.
- I may not have enough aluminium to create the large curve.
- The aluminium may not fit over the timber and curve at the same time.

I prefer this design to the first one because of the organic shapes.  

First design

This is my first design for my LED lamp.

Pros:
- I like the shape of the base.
- I like how the aluminium would go through the wood making it look natural.
- I like how stable it looks to be.

Cons:
- Having the base this way would mean the light is mainly going over the wood and not what you're working on.
- I don't know how I would screw both the pieces of wood onto the aluminium.
- I don't think it would give enough light. 

I like this design but I don't think it would work very well.

Term 1 - Week 1, 2 & 3

This term in Design and Technology we are creating an LED light out of aluminium, LED strips and wood blocks. During class we have been drawing isometric drawings and views of our light designs from the back, front and side. We have also completed all of our OnGuard tests, this means we can use all of the hand-held tools and almost all the electric tools, e.g. The belt sander. I will post some photos up of my designs later as I need to take photos of them all.
:)